| Gothic Steam Phantastic > Information > Stylish pictures |
Stylish pictures tutorial |
 |
| -*- Home -*- Daleth-*- I&I RPG -*- Information -*- Forum -*- Credits -*- Links -*- |
|
In order to spice up steampunk web sites and such with stylish pictures, there are a few possibilities. In this article I will talk about some of them. Your own pictures First of all, there is the most obvious way: draw them yourself. Now this method is not given to anyone; not everyone is a skilled artist. And some skilled artists just don’t get the hang of fake Victorian art. On the other side, don’t be too harsh on yourself. If you are an artist, just bring your art to the public. There is nothing wrong with manga-style steampunk pictures, or dirty machines in pastel colours. You don’t have to copy the style of others to make stylish pictures - just invent your own fantastic style. Existing pictures You can also take the pictures others made. There are two ways to do it:
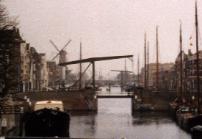
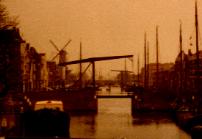
Both ways involve some kind of copyright, regardless of where you’re from. After all, the spirit of copyright-protection is more a form of courtesy than a law. That there has to be a law on copyright is because not everyone is courteous enough to live up to the spirit. All pictures of artists that are still alive or have died less than 70 years ago are copyright protected. You just are not allowed to use these pictures, unless the artist decides otherwise. So if the artist has free clip art, you can use it for free (please do read when and where you are allowed to use the clip art). Some artists have sold their rights to a publisher, make sure you know who owns the copyright. Some clip arts collections on the internet contain lots of copyrighted work without the permission of the artists and are thus illegal. Old pictures, where the artist has died over 70 years ago, are free of copyright - to some extend. You have to have the original picture in order to use it, taking a picture from a modern book violates the copyright of the person who has made the book. Such real old pictures can be found at antique and oddities stores and markets, sometimes in a heritage. If you can’t find out who the artist is and/or whether the artist has died and if when, so you can’t find out the 70-years rule, you are allowed to use a picture 70 years after publication. If the date of publication is not clear either, you have to find out when it is made approximately (fashion styles might help), or don’t use it at all. Faking the old If you have a photo camera and some software to make and edit digital pictures (such as Paint Shop), you can try to fake the old pictures. Here are some ideas of how to do that: a. Choosing your objects The old pictures were quite limited in their objects. People had to sit still for several minutes, moving objects were blurred in the picture. What we usually see is that portraits are made into a photo studio in front of a romantic backdrop. On the street, in the outdoors, people are set still, motionless they gaze into the camera. Who moves, is a blur. You needed lot’s of light to make a picture, pictures in dusk or dawn were hard to make. If you want to make a picture, don’t make a snapshot. Chose your object carefully. Make it motionless. Be very critically about what is on the picture: are there no modern objects to see? Mind aeroplanes, modern trains, digital watches, electricity poles and such before making the picture. Small objects can be digitally removed later if you have some skill for it - but it’s better not to have them in the first place. b. Make your pictures digital If you have a digital camera, this should be no problem. Just download the pictures to your computer. With analogue cameras, you can scan the printed pictures to make them digital, or you can have your photo-specialist have the pictures “printed” to CD-ROM.
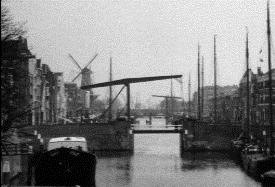
c. De-colourise and re-colourise the pictures. You can chose to make the pictures in black and white, or to use sepia colours. If you want sepia, it’s still a full-colour picture. Most (cheap) software can’t make a sepia from a picture that has been saved as a black-and-white picture. Some software is not able to edit black-and-white pictures. Making a black-and-white picture is quite easy. However, don’t switch the picture to “black and white”: what you need is grey zones. This can be found under either image > mode or filters > settings.
To make a fake “daguerreotype” you have to select the dark parts of your image and copy them. Then de-select the picture and fade the contrast a bit with the contrast-filter. Paste the dark parts in it. What you get is that the dark parts have sharper edges.
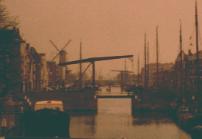
To make a sepia image, you either use a filter that has been preprogrammed, or do it by hand. By hand, you have to change the intensity of the RGB colours separately (Red-Green-Blue). For sepia, you need a lot of red and a bit of green (yellow) in the image. If the colours are too bright, you can adjust the brightness later.
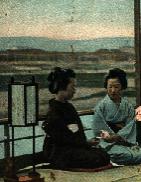
You have to try yourself and see what works for you. Check the manual for your software if you are not sure where to adjust brightness, intensity and blur. Some modern software might have preprogrammed filters that makes fake old pictures with just one mouse click. What we see on old black-and-white pictures (and in old movies sometimes as well) is that sometimes some colour has been added later, by hand. These are usually pastels. You can try that on your own pictures by using the digital airbrush.
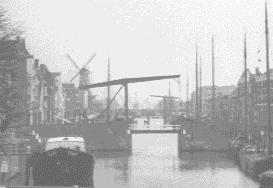
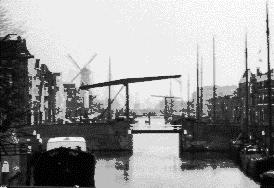
d. Blur If you want, you might blur some parts of the picture to suggest decay or movement. Most software has an option for blurring parts of the picture (first select the part that should be blurred, then blur...). To “blur” a lot of the picture, you can adjust the brightness of the full picture.
e. Frame If you want to frame your picture in a beautifully cut piece of paper, you can use an existing picture with such an edge and scan it (with a black backdrop). Remove the picture by either erasing it, or pasting your own picture directly over it. With a bit of fiddling, you then have your own picture in the vintage cut paper edge of an existing one. By selecting a small part of the paper as a “texture” and then chose that texture for the airbrush, you can fade the edges of the picture on the paper. Inserting new stuff By using “old” pictures, you make it look like someone from now looks into the past. If that is what you want it’s all right. But there are ways to make it believable that modern pictures fit into a Victorian site:
To get pictures with a Victorian setting, you can go to museums with a Victorian collection. If you do, be sure you are allowed to make pictures there and publish them. In some museums they let you extra pay for making pictures, and some don’t want any pictures from their collection to be published without their permission. © Yaghish 2004 Japanese beauties: Picture from "Intern, Kunst-, Kunsthistor. u. gr. Gartenbau-Ausstellug" Düsseldorf 1904. Schmitz & Olbertz/ Louis Glaser, Leipzig. Privat collection. Used software: ColorIt!, Kai's Photo Soap and ClarisWorks You have questions, additions or discovered errors in this article? Please leave your comment in the Green Faerie Corner. |

| -*-© Steammasters 2003-*- |
| ^ Up |